Everything here runs from a basket of flip-flops you finish in one evening to a weekend build like a floral hoop or a hanging jar backdrop, so the idea that fits is set by how many free evenings you have before the date, not by how much you want to spend.
Items you can batch while watching TV, such as flower napkin rings, suit a short timeline, while a backdrop of hanging jars needs a venue that lets you attach things.
1. Wedding Party Flip-Flops
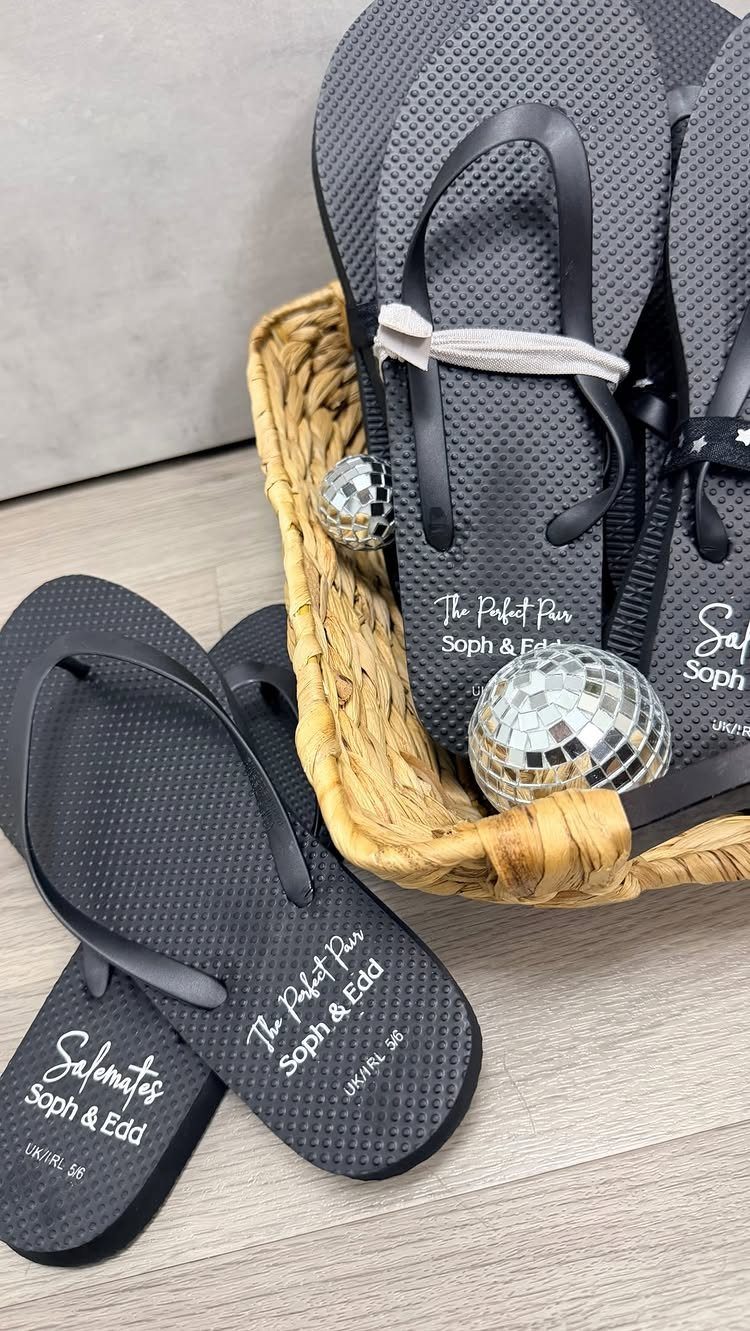
Heels come off by the second hour of most receptions, and a basket of flip-flops by the dance floor means nobody has to go barefoot on a hard floor.
Printing the couple’s names and a pun, like the "Solemates" line, turns a practical item into a keepsake.
Black goes with any dress or suit color, so guests won’t clash with the palette. Set the basket out where people will see it as the dancing starts, and add a small sign so it doesn’t go unnoticed.
2. DIY Flower Napkin Rings
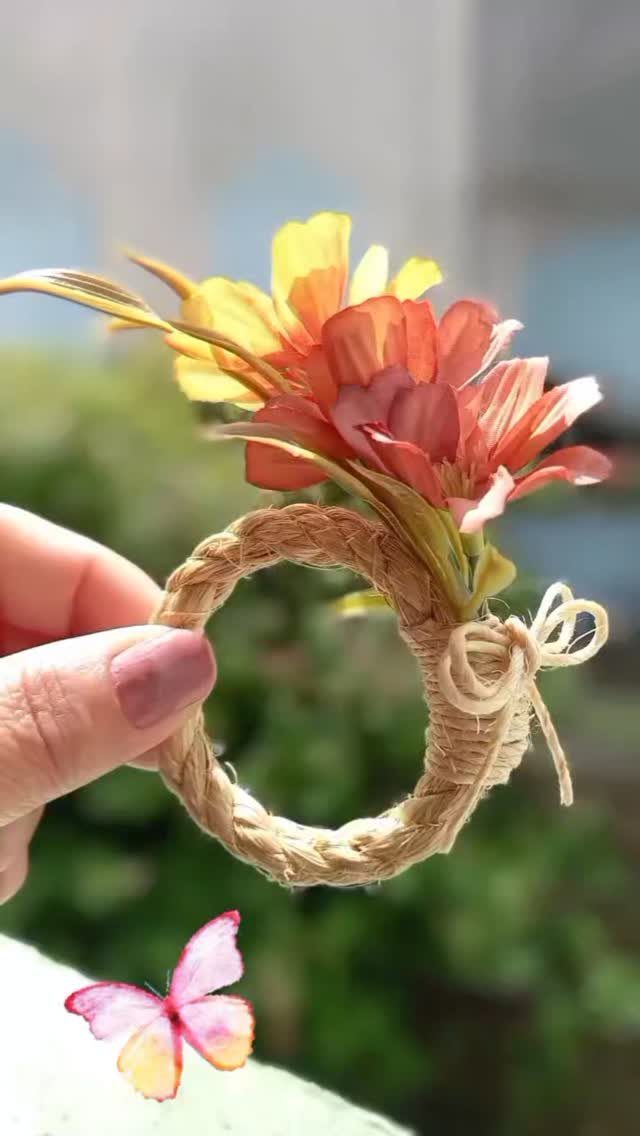
Twine is the cheapest way to dress a napkin: wrap a few turns around a cardboard tube or your own fingers, then glue on a couple of faux blooms and a small bow.
Orange and yellow flowers like these read warm and rustic against plain white napkins.
I’d make one as a test first, then batch the rest in a single evening while watching TV. A hot glue gun is faster than anything else, and the twine hides the seams.
3. DIY Floral Hoop Backdrop
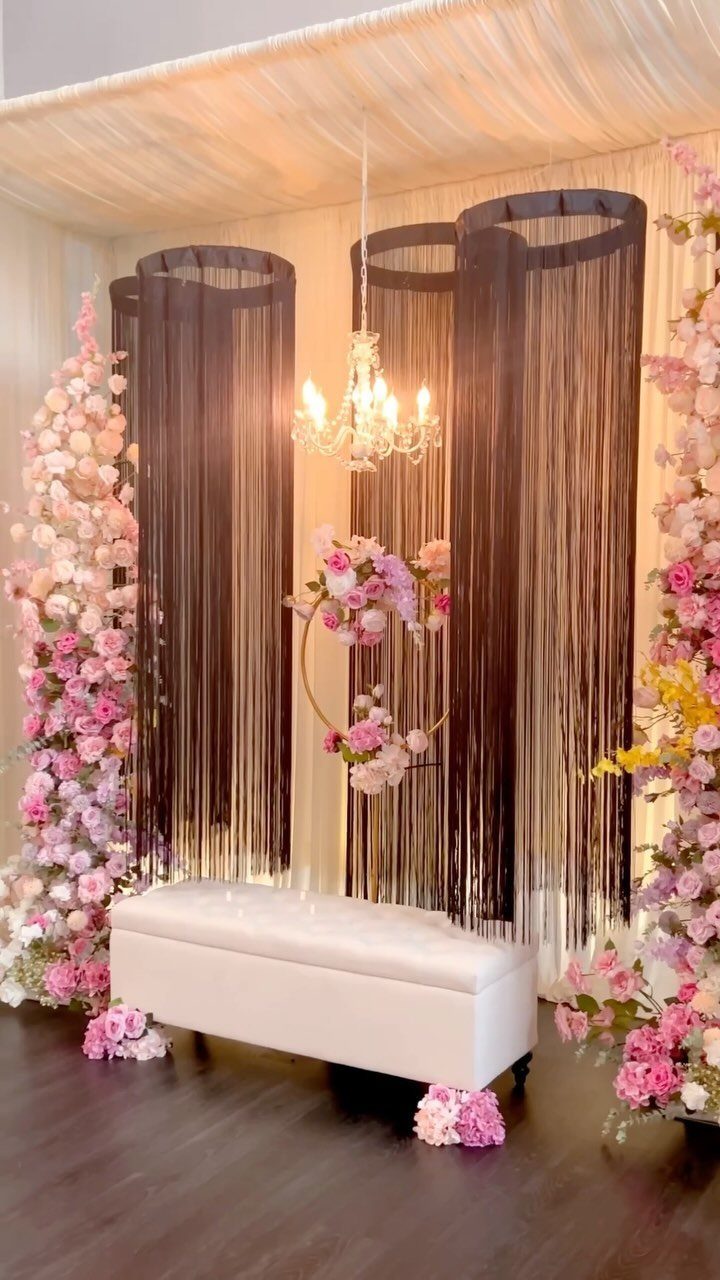
A hoop covered in flowers gives photos a focal point, and it works best when the backdrop behind it stays simple.
Fringe curtains and a single bench, as here, keep the eye on the florals so you only need to build one thing.
I would spend the effort on the hoop itself and keep the rest plain. Fuller flowers on one side look better than an even ring, and the bench gives guests a spot to sit for portraits.
4. DIY Table Number Frames
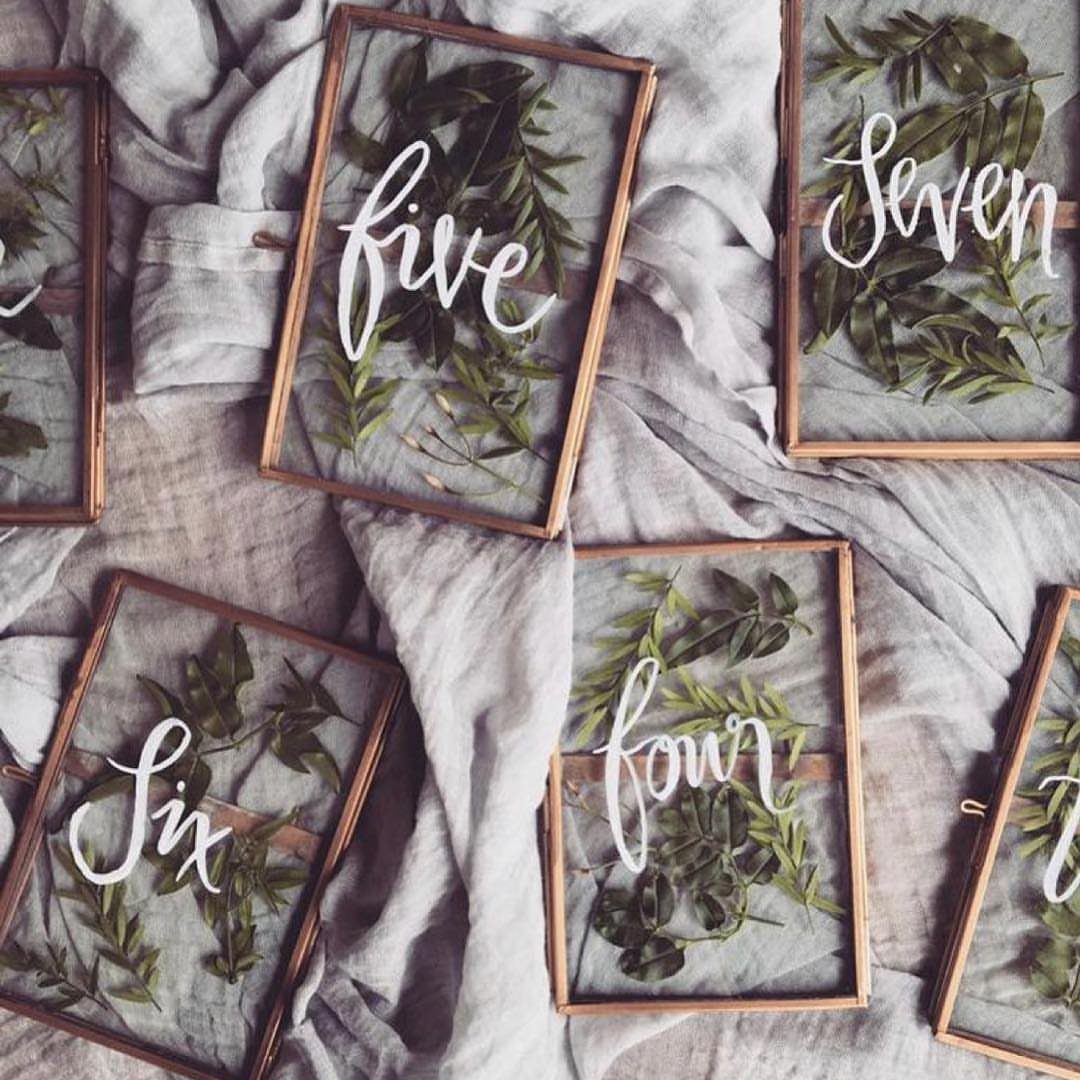
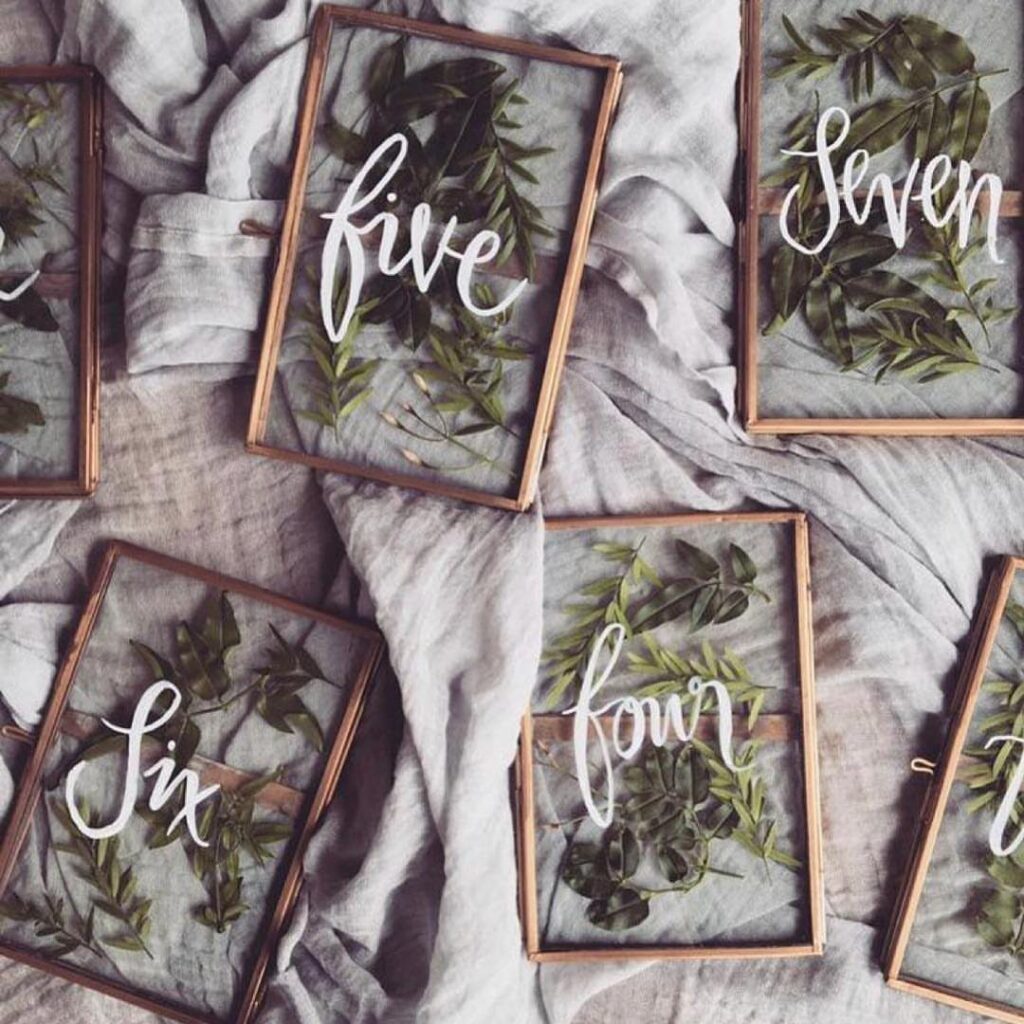
Glass frames with greenery tucked behind the panel and a number written in white cursive look far pricier than they are. Gold frames add a warm edge against any tablecloth.
Write the numbers with a white paint pen, and practice on scrap paper first, since cursive is unforgiving on glass.
Keep the lettering the same size across every frame so the set looks consistent when guests scan the room for their table.
5. DIY Floral Bouquets
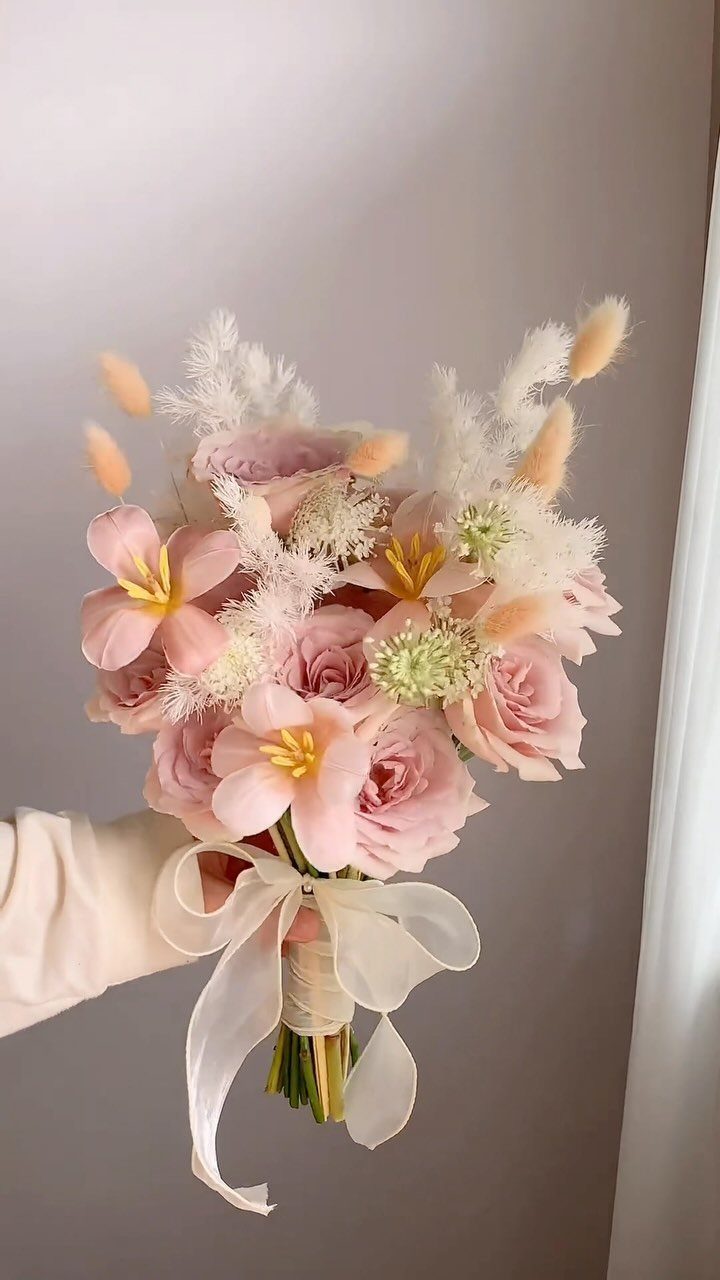
Bouquets are one of the easiest places to cut cost, because you control the stem count. A mix like pink roses, lilies and dried grasses gives you texture without needing a huge bunch.
Gather the stems in your hand, turn them as you add each one, then bind the handle tightly and wrap it in satin ribbon.
Make a practice bouquet first. I would assemble the real ones as close to the wedding as you can manage, so the flowers stay fresh.
6. Dollar Tree Wedding Candles
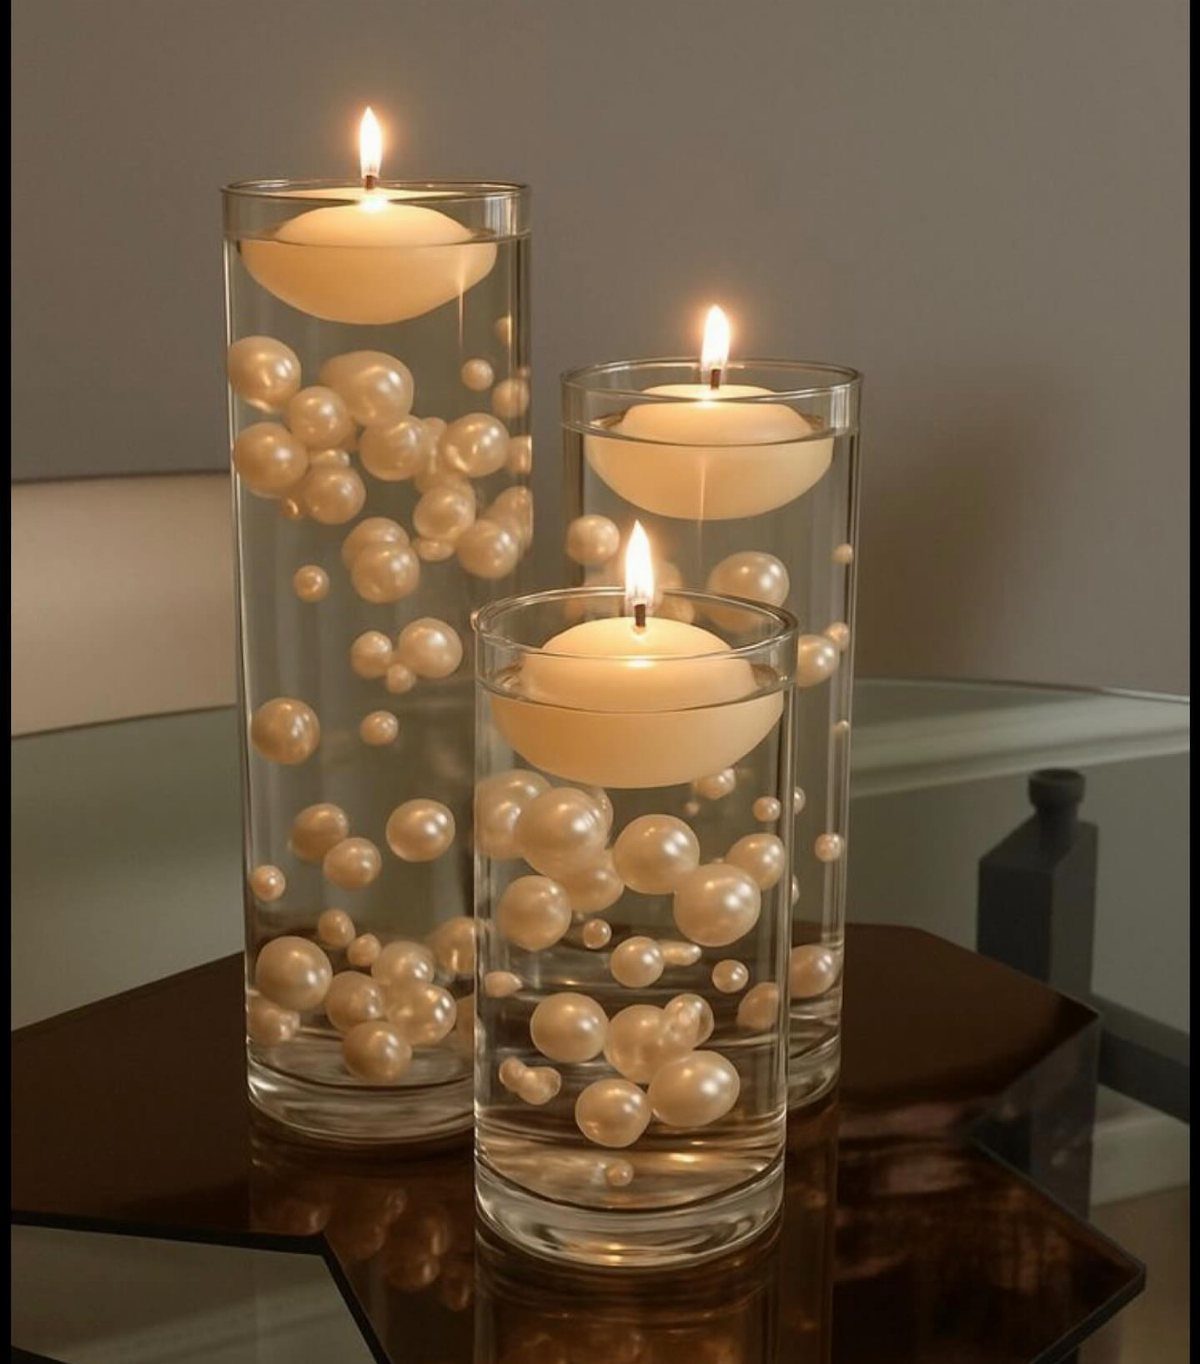
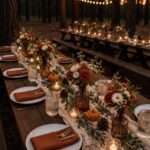
Floating candles in tall glass cylinders turn a table into something soft and glowing, and the white pearls on the bottom add shine without more flowers. 3 vases at different heights make a centerpiece with almost no styling.
Fill each vase with water, drop in the pearls, then float the candle on top. Grouping three of different sizes looks better than one big vase, and the cost stays low if you buy the cylinders in bulk.
7. Floral Initials Decoration
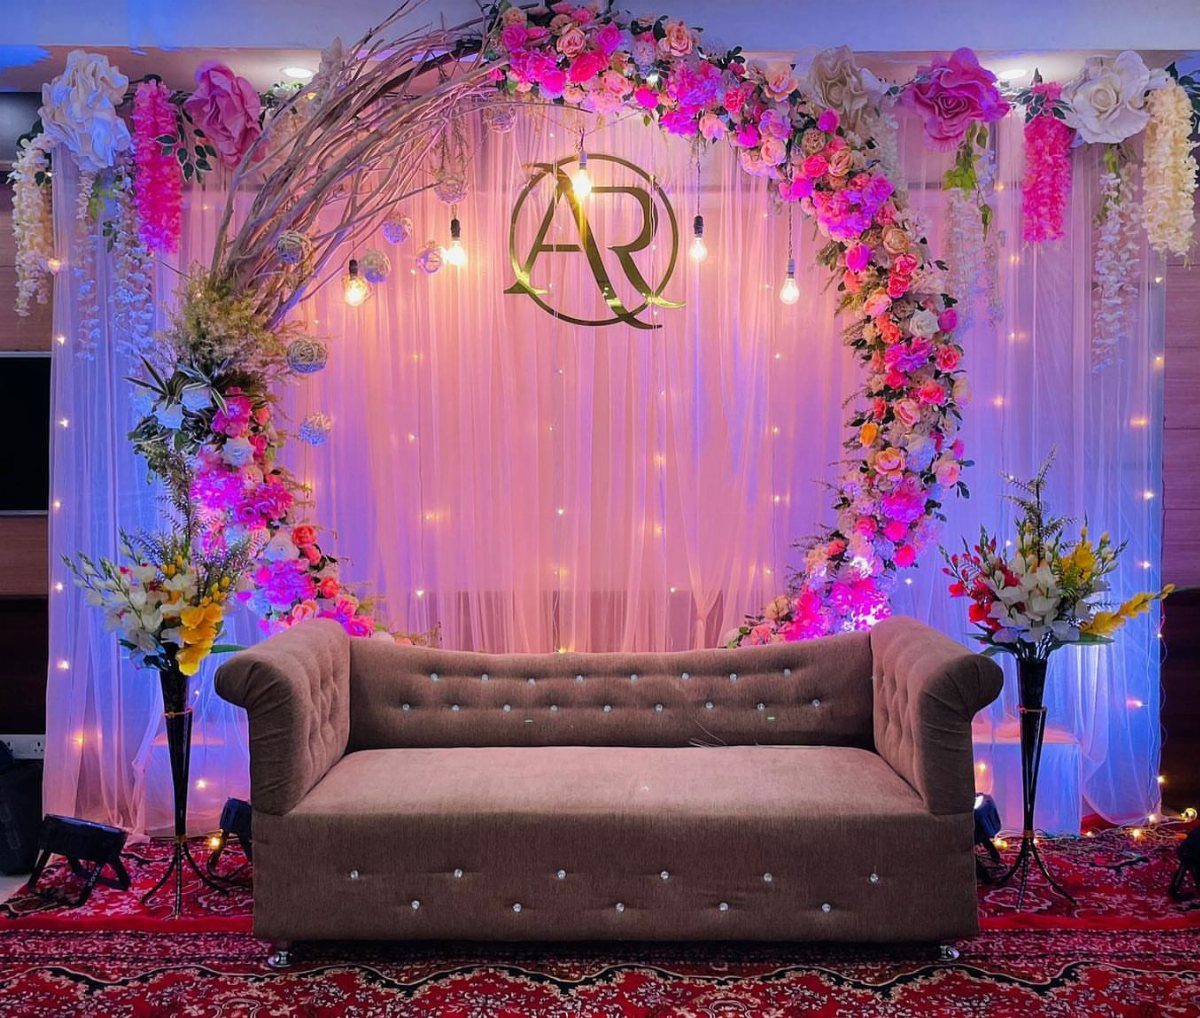
2 gold letters hung inside a round floral frame turn a plain backdrop into a monogram moment. The initials sit in the center of the hoop, so the flowers frame them instead of competing with them.
Choose a single metallic finish for the letters, gold or silver, so the flowers supply all the color. A plain, light backdrop behind the monogram keeps the letters readable in photos.
8. Tissue Paper Flowers
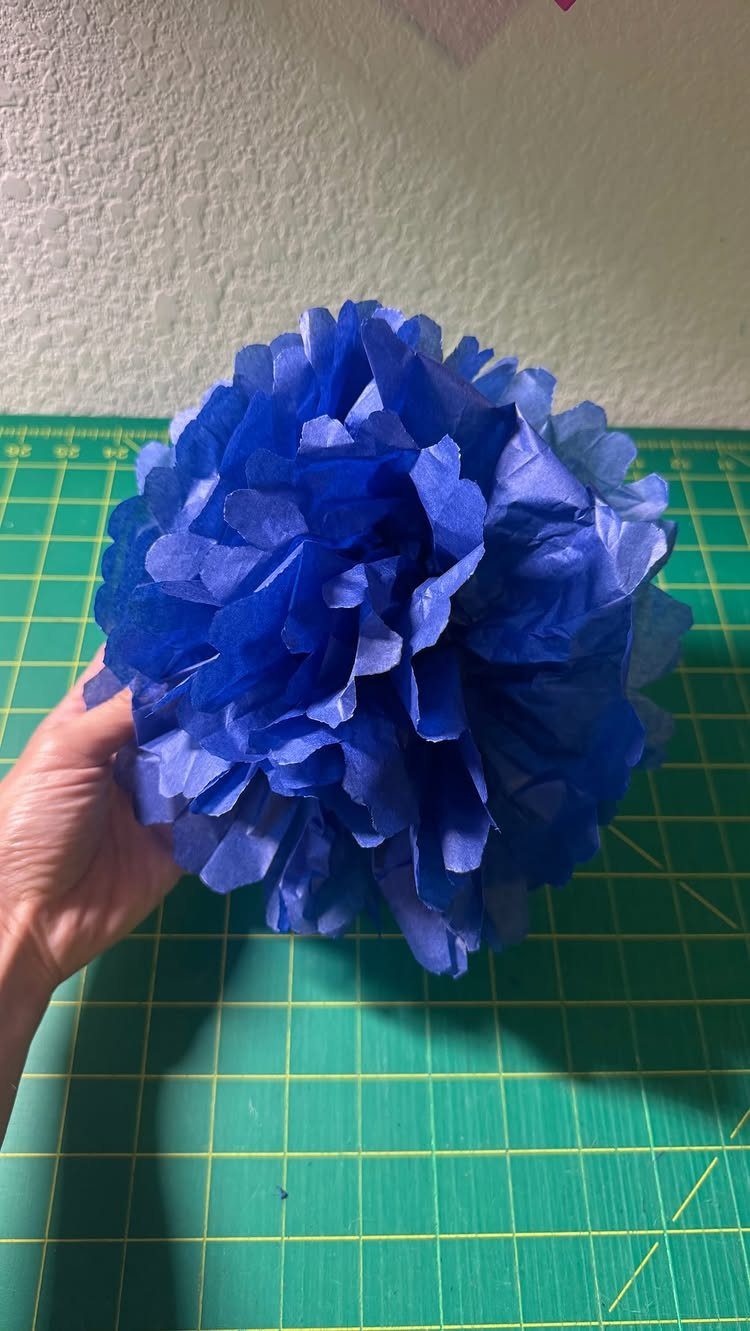
A tissue paper pom-pom is made from layered sheets that you fold, pinch in the middle and fluff apart one layer at a time. Blue like this one reads bold and cheerful, and it costs very little.
Make a few in different shades and group them rather than scattering single flowers. I would fluff them last, once the whole batch is assembled, so the petals don’t get crushed in a box.
9. Upcycled Sauce Jar Boho Vases
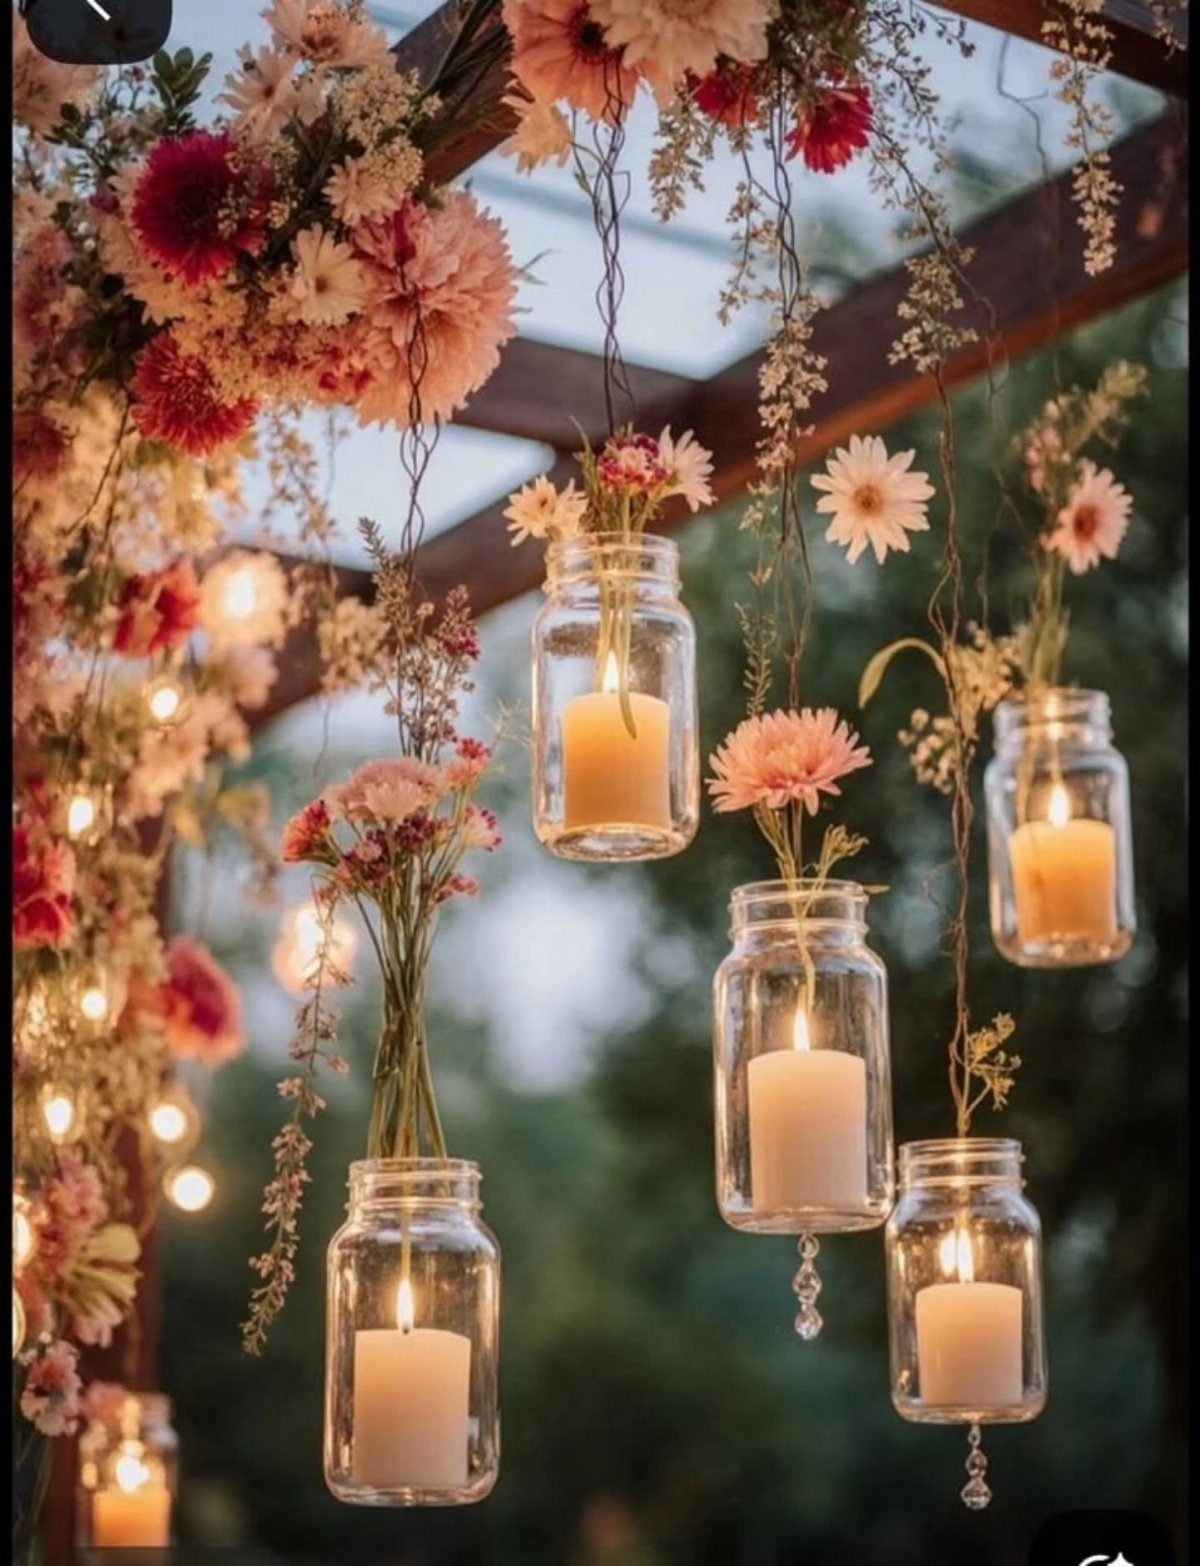
Glass jars hung from a wooden pergola, each holding a candle and a few flowers, give an outdoor ceremony a boho feel for the price of jars you may already own.
Soak off the labels first, then wipe the glass clean.
Hang them at staggered heights so the eye moves across the beams. I’d keep the flowers small and loose, since a tight bouquet looks heavy in a jar.
10. Dollar Tree Dessert Displays
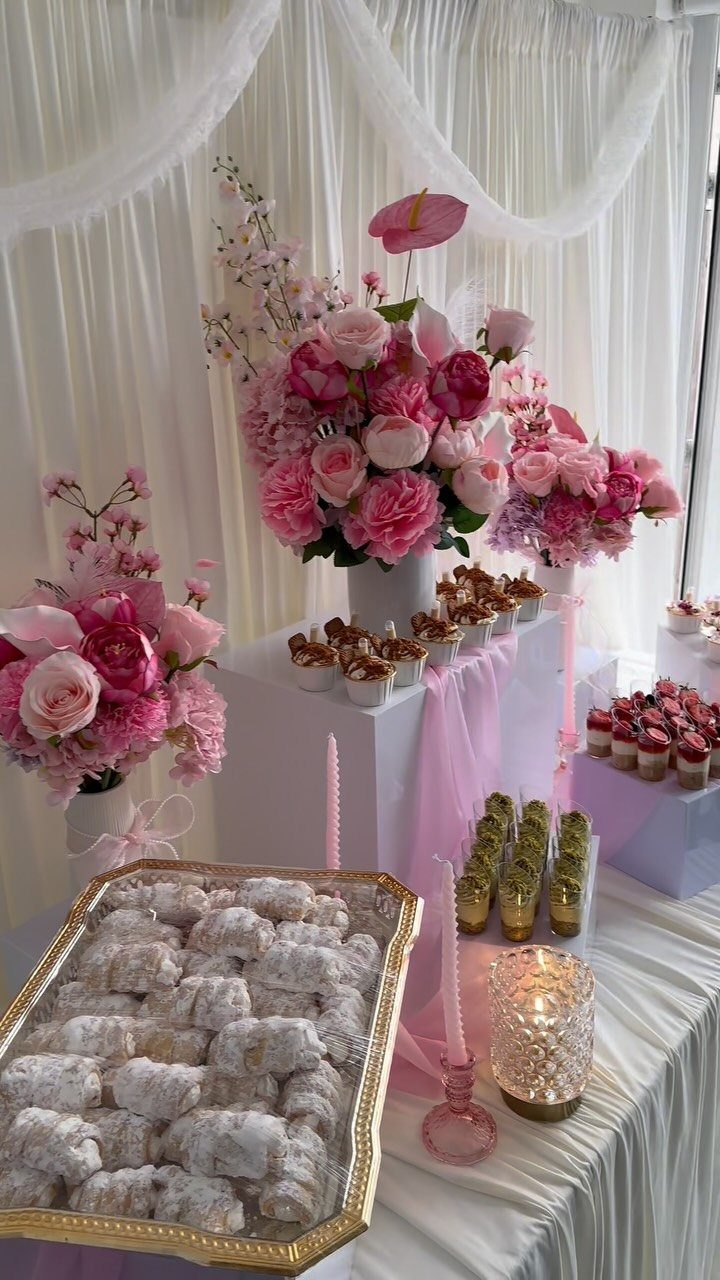
Gold trays lift cupcakes, powdered pastries and small dessert cups off the tablecloth, so a plain table reads as a styled one.
Vary the heights with a few stacked trays or upturned bowls under the cloth. I’d stick to one metallic color so the desserts stay the focus.
11. DIY Framed Seating Arrangement
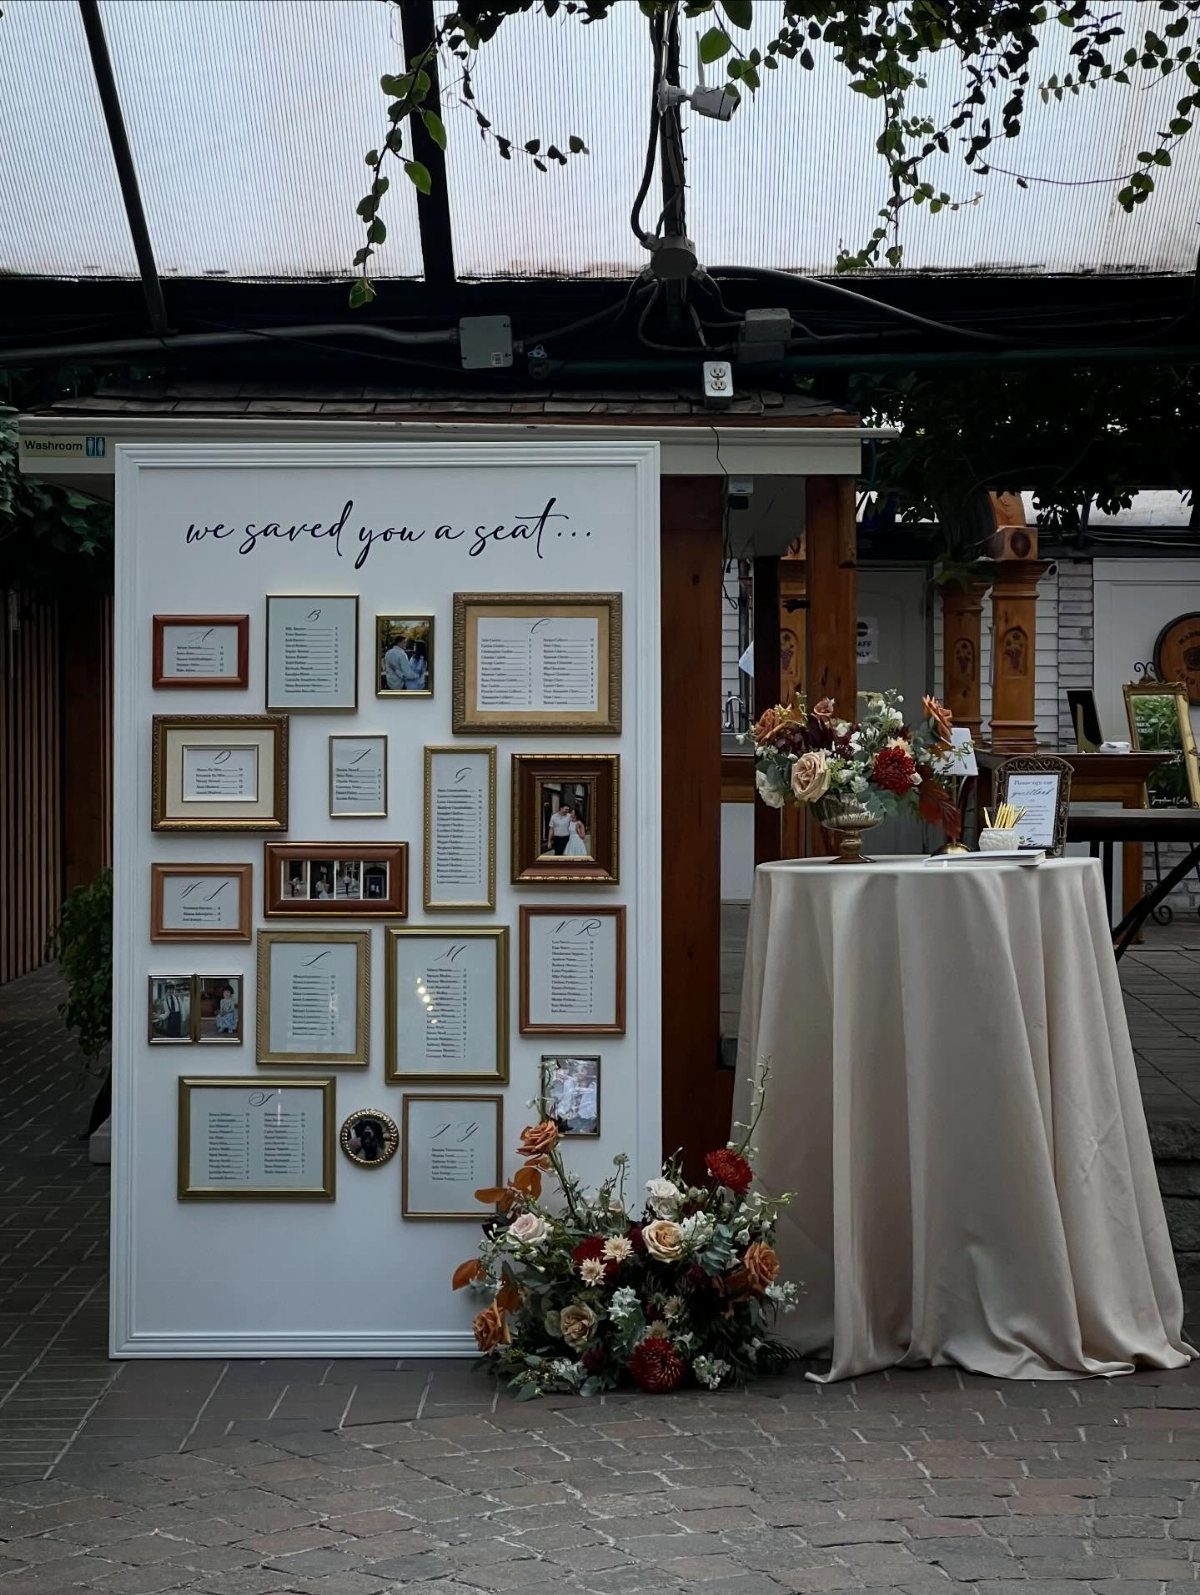
A seating chart built from gold-framed lists beats a single sheet of paper, because each frame holds one table’s names and guests can find theirs fast.
Write every list in the same lettering and alphabetize the names. Placing a flower-draped table beside the board gives guests room to gather without blocking the walkway.
12. Dollar Tree Candy Bar
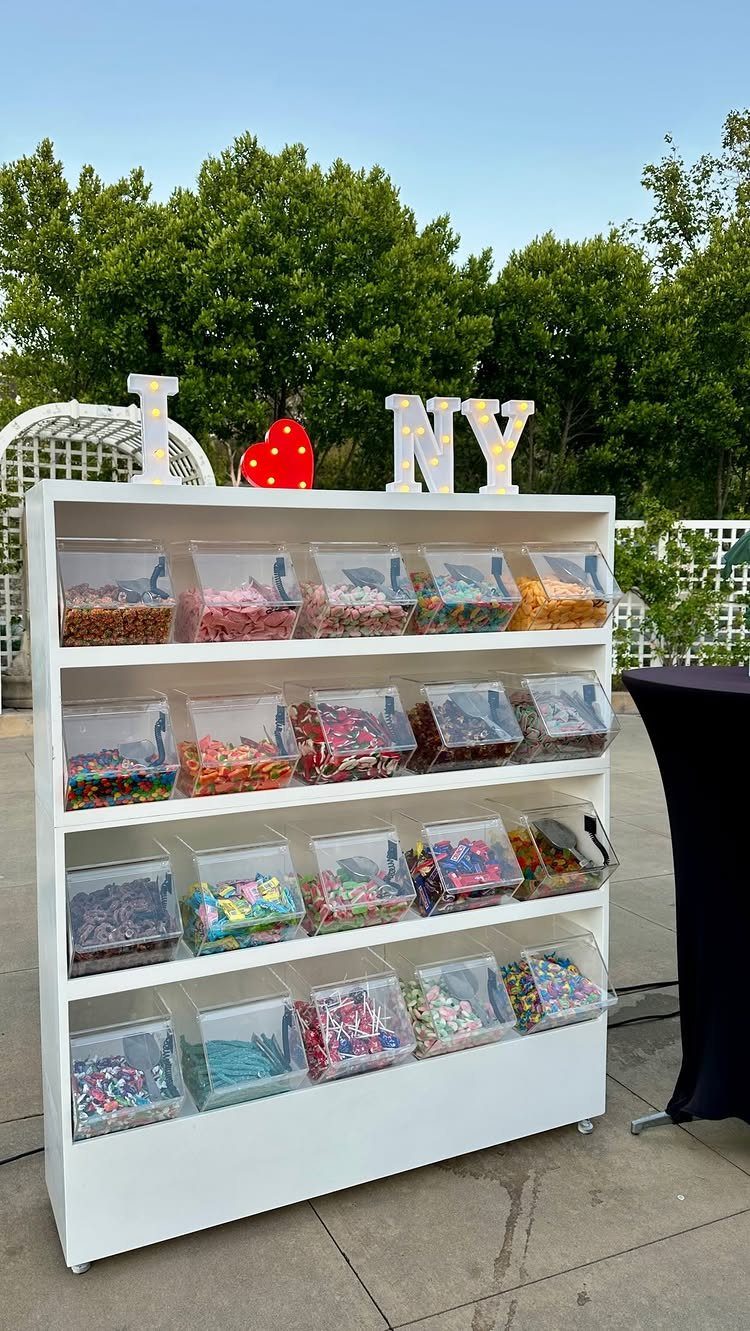
Clear bins on white shelves let the candy do the decorating, since the colors show through without any extra styling. Light-up letters and a red heart on top give the bar a sign people can spot from across the lawn.
Sort the candy by color, one bin per shade, and add scoops or tongs. Provide bags so guests can take a handful home, which doubles as a favor.
13. Dollar Tree Table Settings
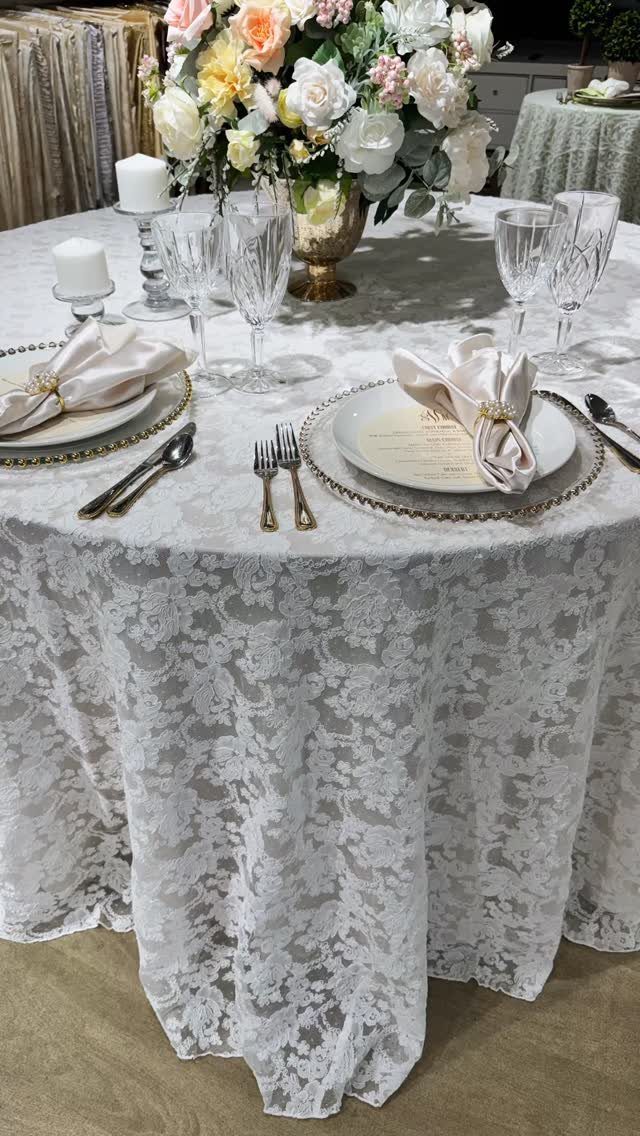
Keep the centerpiece low so guests can see each other across the table. I’d set one full place first, check it from a chair, then copy it around the room.
14. Hanging Fairy Light Jar Backdrop
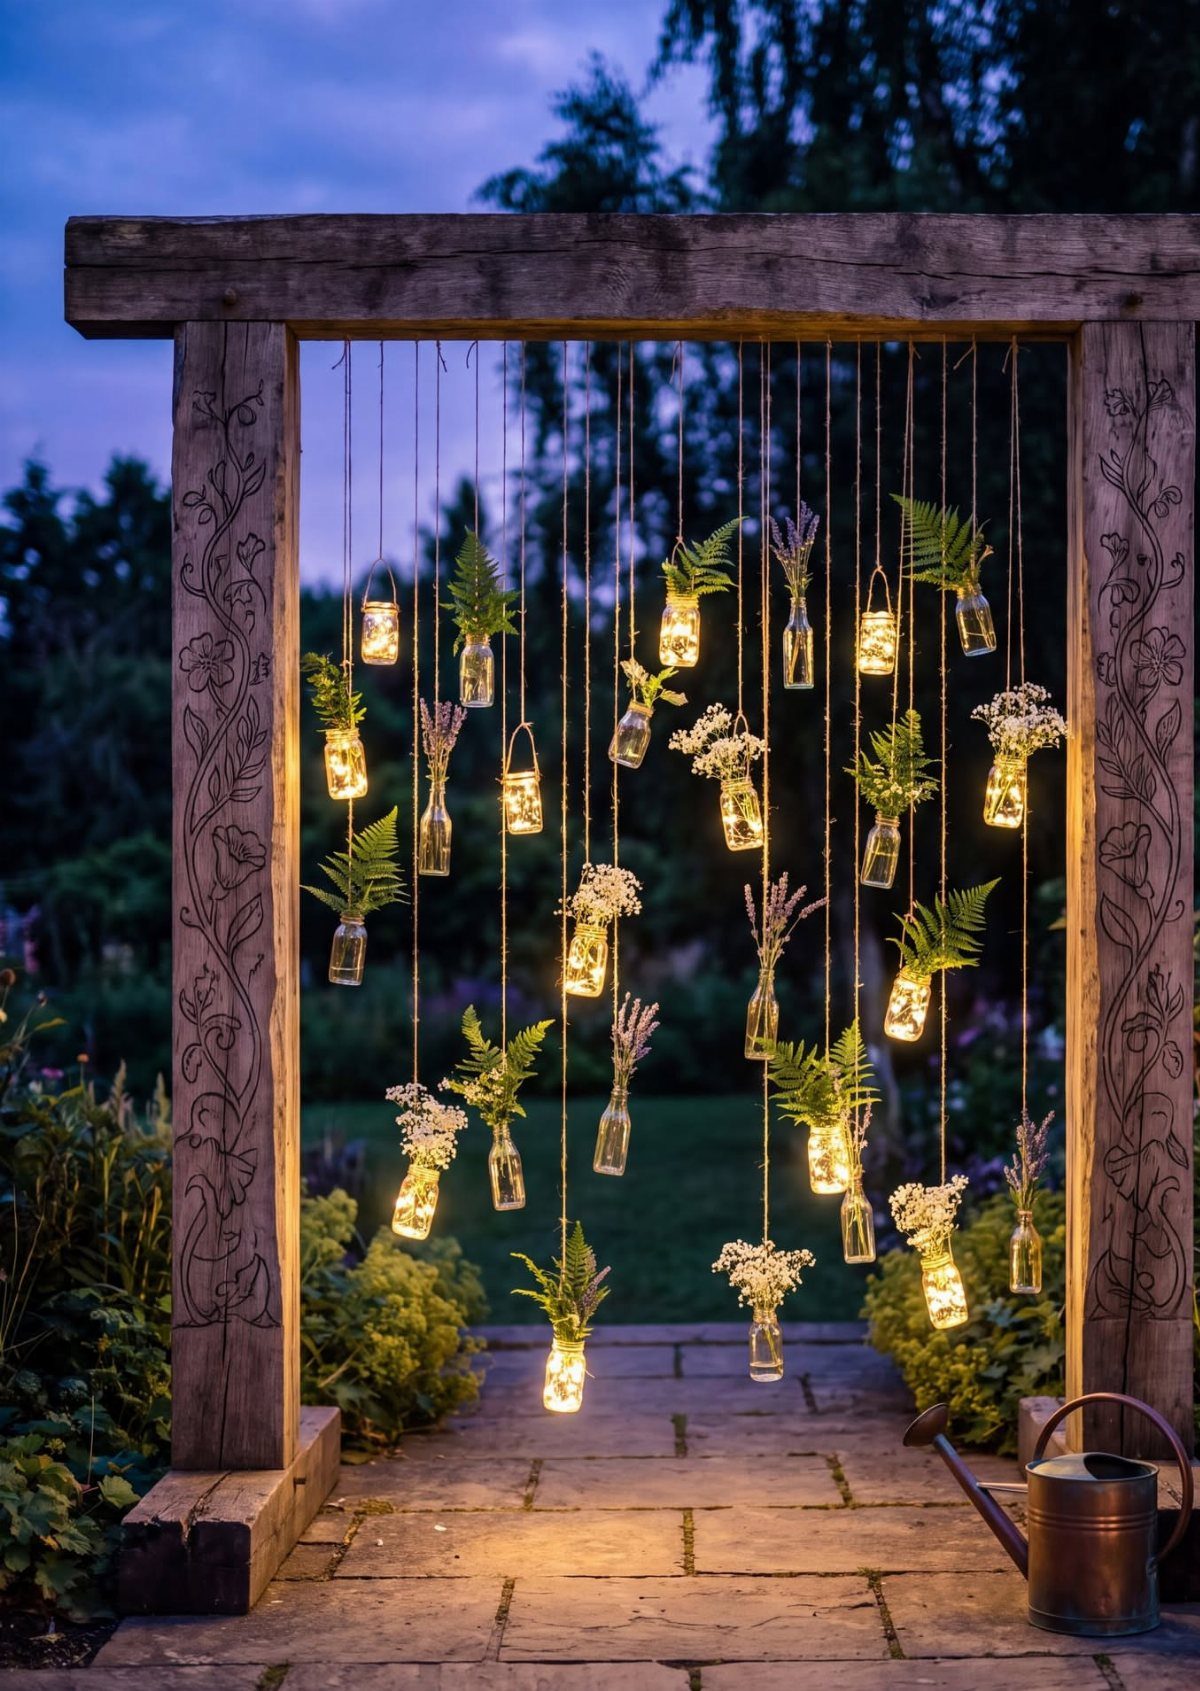
Glass jars strung from twine under a wooden beam, each holding fairy lights and a sprig of greenery, make a backdrop that glows best at dusk. One frame and a pile of jars is the whole build.
Tie the twine with a snug knot around each jar neck, and hang the jars at different lengths so the cluster looks full instead of lined up.
I’d test the lights before hanging, since fixing a dead strand overhead is a pain.
15. Gold Picture Frame Photo Wall
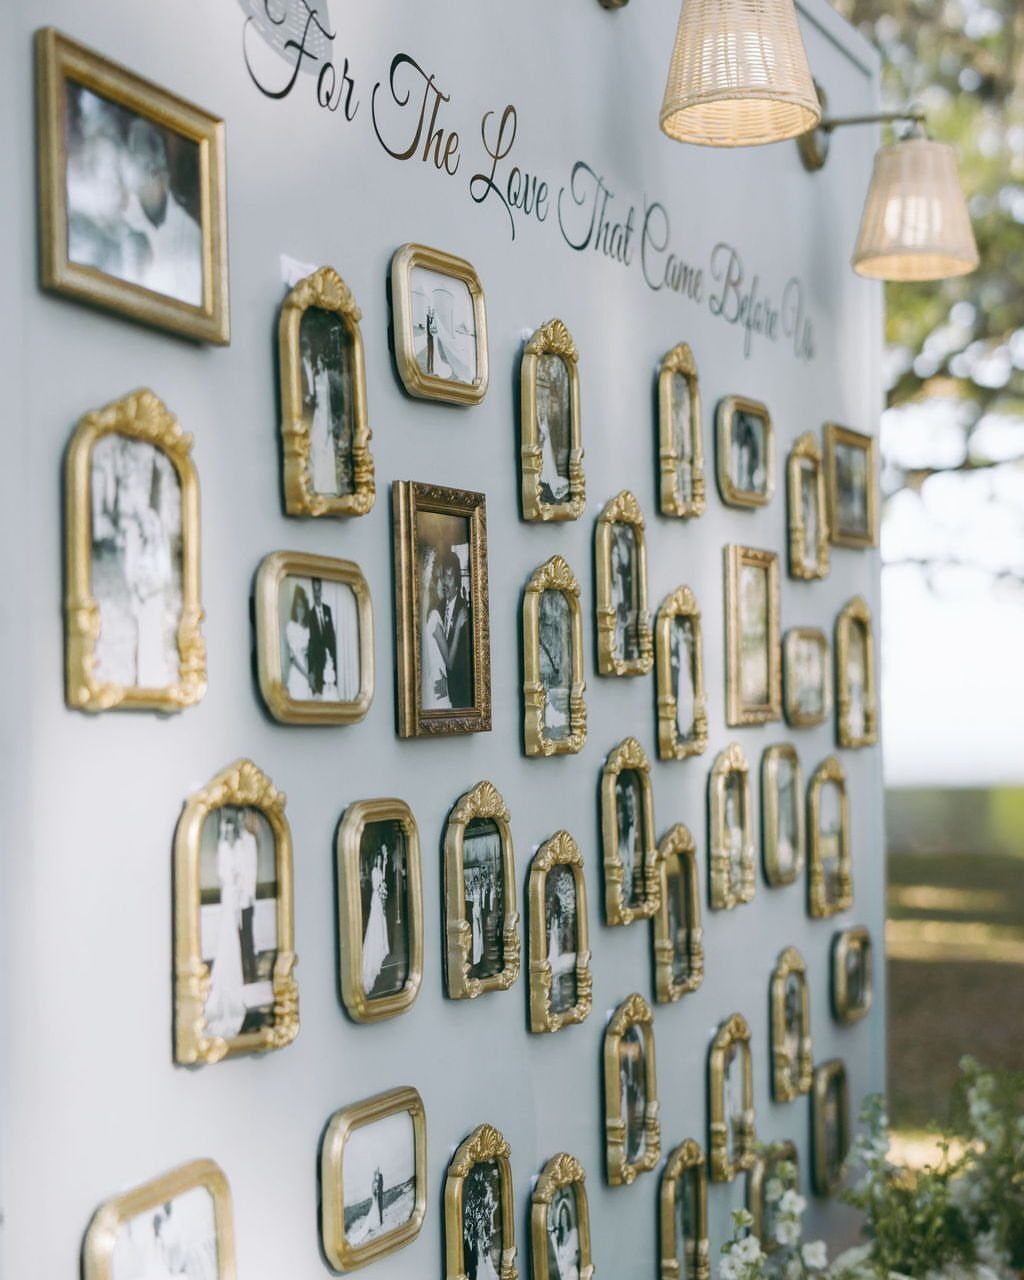
Mismatched ornate gold frames filled with black-and-white photos of couples make a wall that reads as family history. A line of text above them, like the one here about the love that came before, gives the display a point.
Black-and-white prints unify photos from different decades, so printing everything in one tone matters more than matching the frames. I’d lay the whole arrangement on the floor first, then hang it.
16. DIY Acrylic Drink Menu Sign
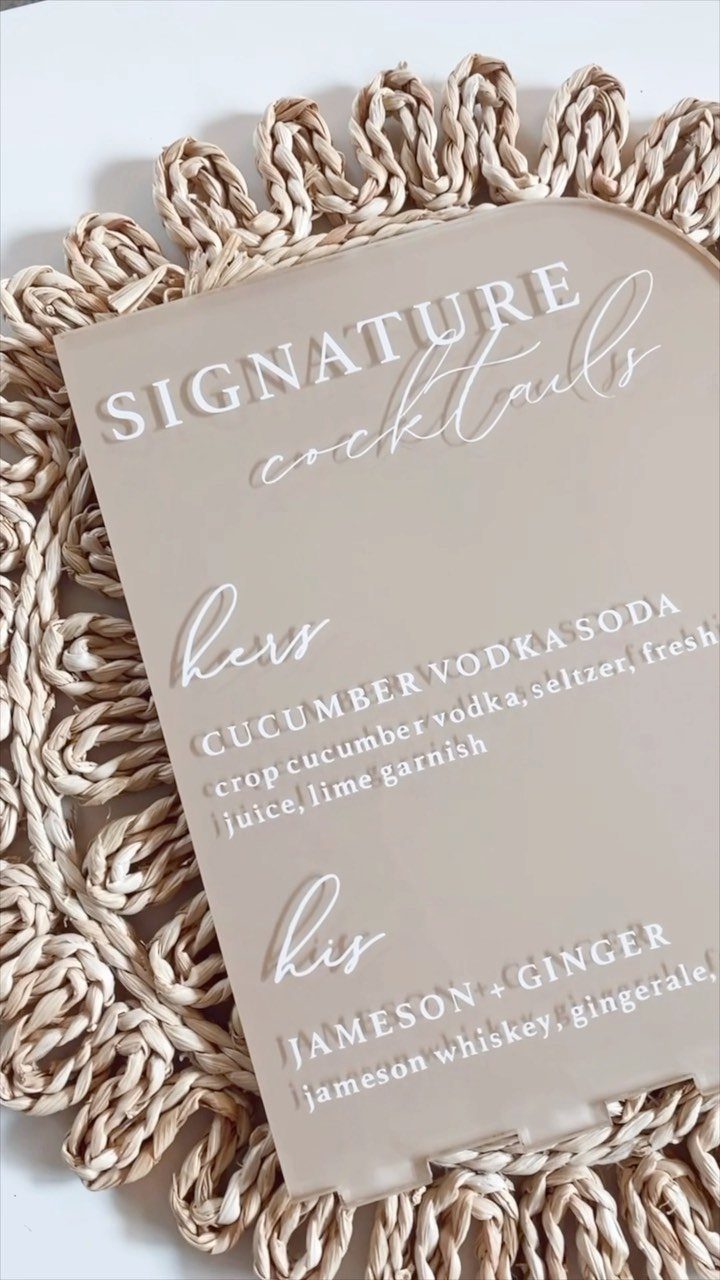
A clear acrylic sign with white lettering lets a two-drink menu sit on the bar without hiding anything behind it. Splitting the cocktails into "hers" and "his" gives guests a reason to read it.
Keep the wording short: a name and two or three ingredients per drink.
Setting the sign on a woven mat, as here, adds texture and keeps it from sliding. I’d print a paper mock-up first to check spacing.
17. Painted Canvas Couple Sign
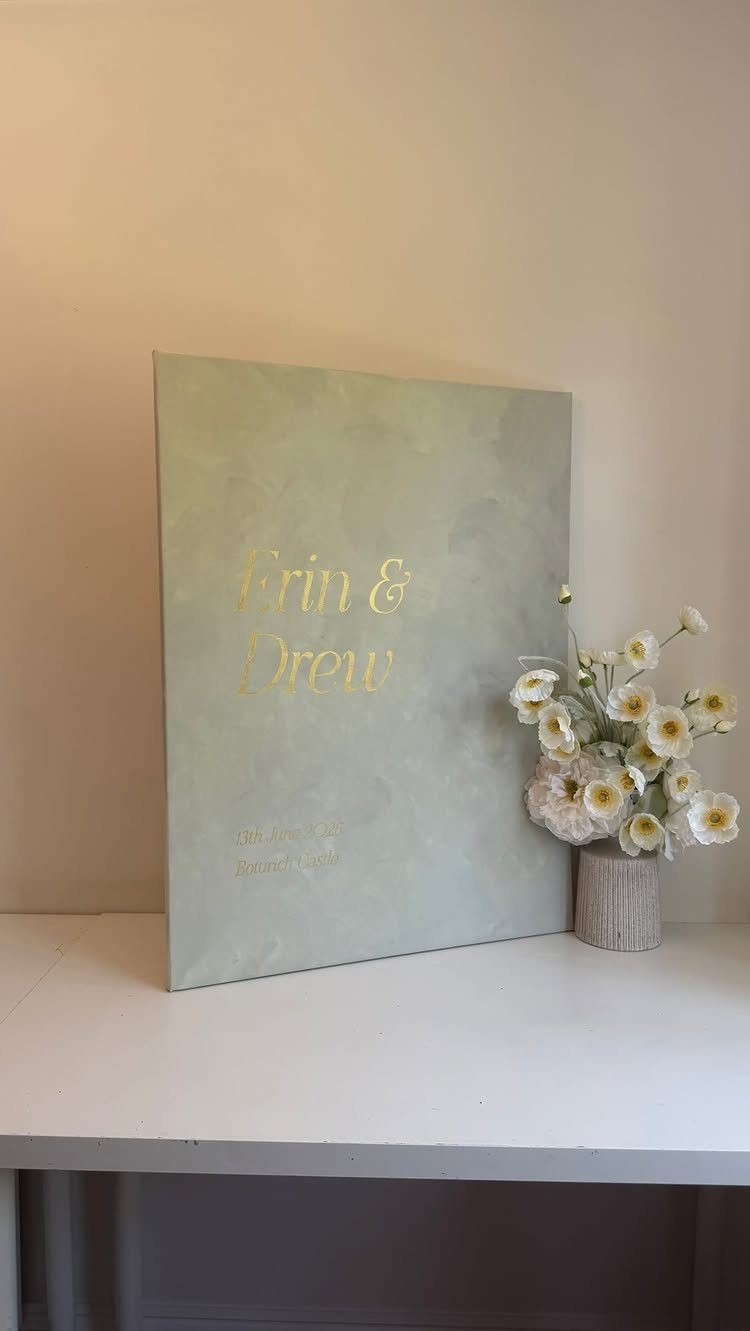
Gold calligraphy on a light green canvas gives you names, date and venue on a sign that doubles as a keepsake for the wall at home.
Pencil the lettering lightly before you paint, then give the base coat a full day to dry so the gold stays crisp. I’d choose one line of script for the names and a plainer hand for the details.
18. Bubble Send-Off Baskets Display
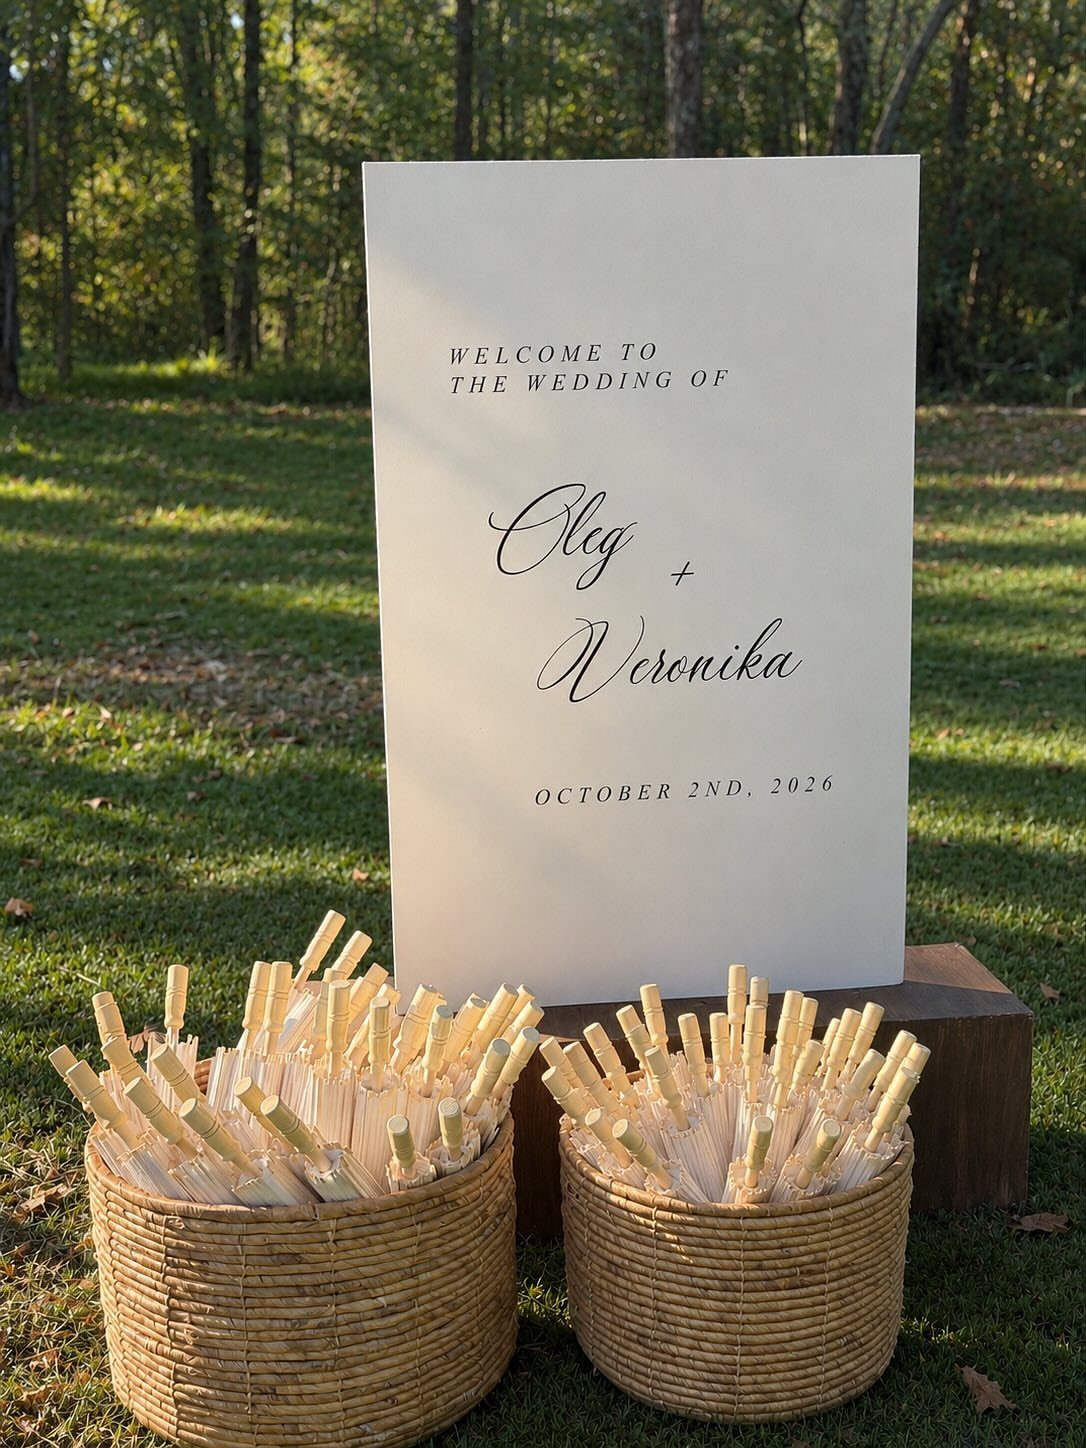
2 woven baskets of bubble wands beside the welcome sign give guests something to hold from the moment they arrive. Bubbles also stand in for the usual send-off, so one setup covers both.
I’d place the baskets at the entrance and again near the exit, or simply leave them out all day. Fill them to the brim so wands are easy to grab, and keep the sign light so the baskets get noticed.
19. Colorful Ceiling Fabric Streamers
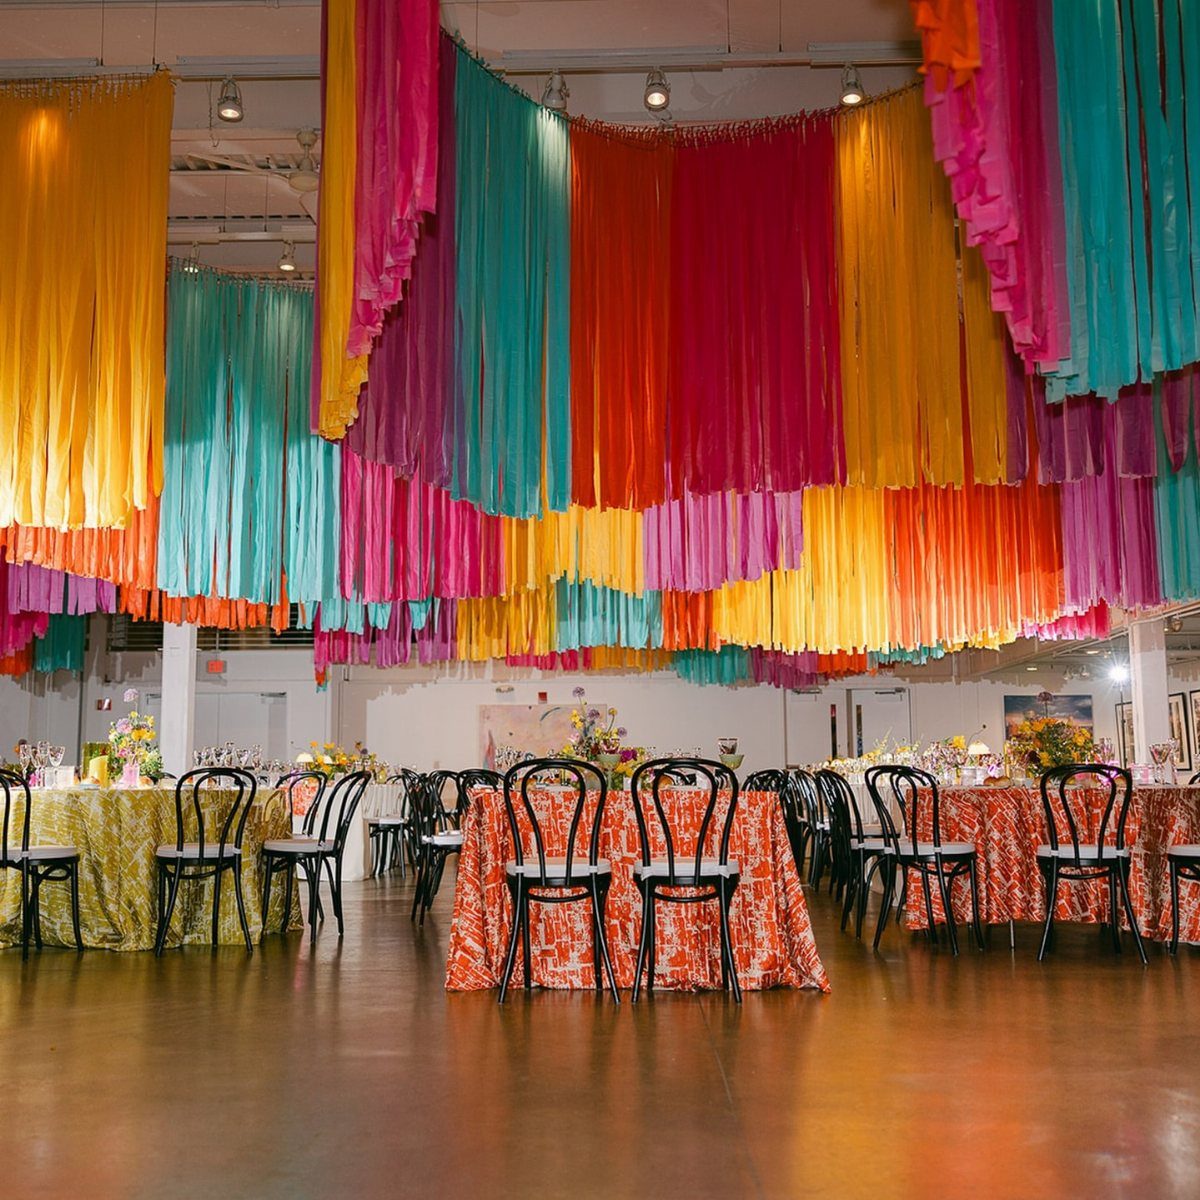
Fabric streamers in mixed colors turn the ceiling into the decoration, so the tables below can stay simple.
Patterned tablecloths and black chairs already carry plenty of color, which makes a ceiling this bright a bold choice, and I like it for exactly that.
Hang strips in different lengths so they ripple instead of lining up.
Repeat two or three of the colors from the tablecloths, so the room reads as one plan. I’d measure the ceiling height first and check with the venue about what it allows you to attach.
Buying in Bulk
Order online in bulk and choose in-store pickup. Shipping is where a pile of $1.25 items quietly stops being cheap, and pickup skips it.
Decide quantities before you click. Count tables, guests and place settings, then add a small cushion for breakage and the one box that arrives damaged.
Whatever you save belongs in a bigger line item, such as flowers, photography or the cake. Moving the money on paper keeps it from disappearing into extra impulse buys.
Using Artificial Flowers
Artificial flowers cut the florist bill, and they buy you time. You can build bouquets weeks ahead, see exactly how they will look, and skip the worry about wilting in summer heat.
My favorite way to keep them from looking plastic is to mix in real greenery from the grocery store. Faux blooms with fresh leaves read far more natural, and the greenery costs little.
Allergies are another reason to go faux.
For a budget bouquet, I wrap a paper towel tube in ribbon for the handle, cap it with a foam craft ball, and press the flower stems into the foam until no ball shows.
Fake bouquets also keep. Displayed in a vase afterward, one can last for years.
Repurposing Items
Dollar store aisles hold plenty of things never meant for weddings, so walk them with a bride’s eye before any cart fills up.
Home decor, seasonal party goods and personal products can all find a second life on a reception table.
Ask one question of each item: does it look good once the price tag is imagined away? Color, shape and finish matter more than what the item was designed to do.
Stick to a small palette across everything you repurpose. Mixed finds look planned when they share two or three colors, and scattered when they don’t.
Buy one of each first and test it at home under the lighting you expect.
Frequently Asked Questions
Does Dollar Tree have wedding decorations?
Yes. The shelves hold vases, trays, candles, ribbons, and plastic stemware that cross over from everyday use to wedding-ready with no modification at all.
Items run about $1.25 each, so a full setup stays cheap. I’d walk the aisles with a bride’s eye and ask whether each piece still looks good once you imagine the price tag away.
Where can I buy cheap wedding decorations?
Dollar Tree is my first stop, since items cost about $1.25 each and cover candles, trays, frames, jars and faux flowers. Order a sample of anything you’re considering and set it up at home first, under similar light.